Summary
Geo Areas within BMS are used to categorise customers by geographic region. Geo Areas are available as a dropdown when creating or editing a customer record. They can be manually created or imported in bulk.
How to create or import Geo Areas into BMS
- Step 1: Adding a Geo Area manually
- Step 2: Importing Geo Areas (optional)
- Step 3: Verifying the Geo Areas are available
Step 1: Adding a Geo Area manually
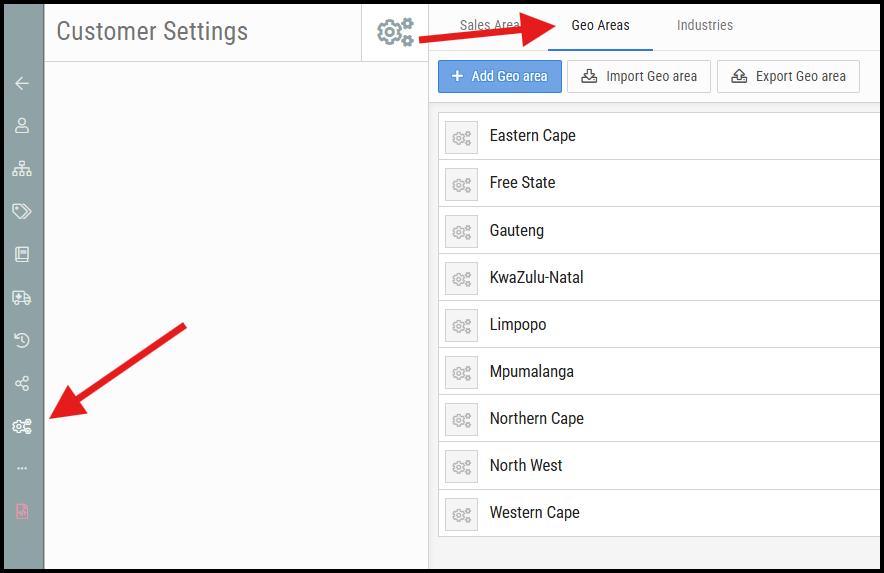
- In BMS, go to Admin > Settings > Customer Settings > Geo Areas.
- Click on the Geo Areas tab to view the full list of existing Geo Areas.
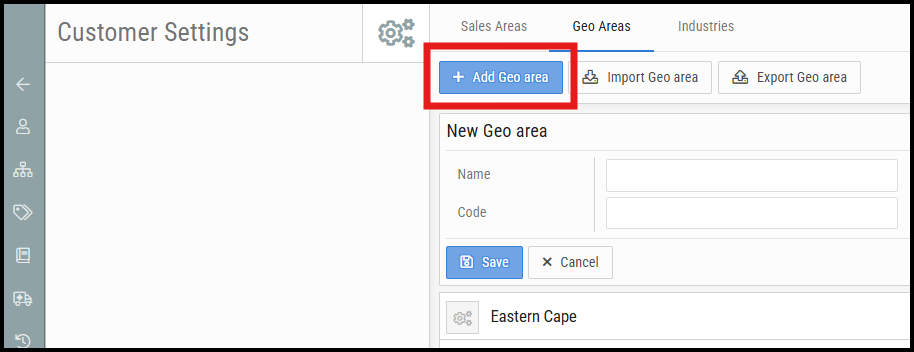
3. Click + Add Geo area.
4. Enter a Name and a unique Code.
5. Click Save.
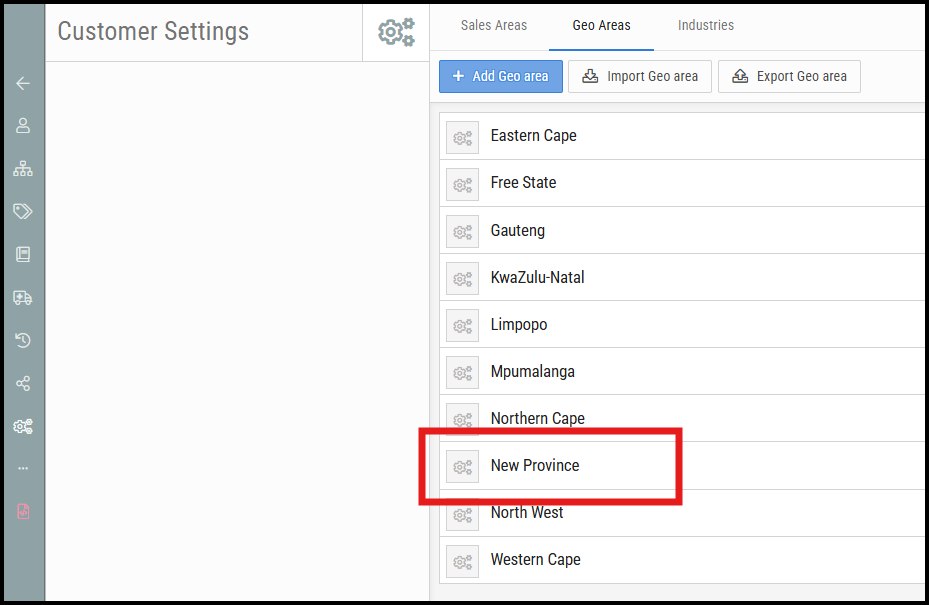
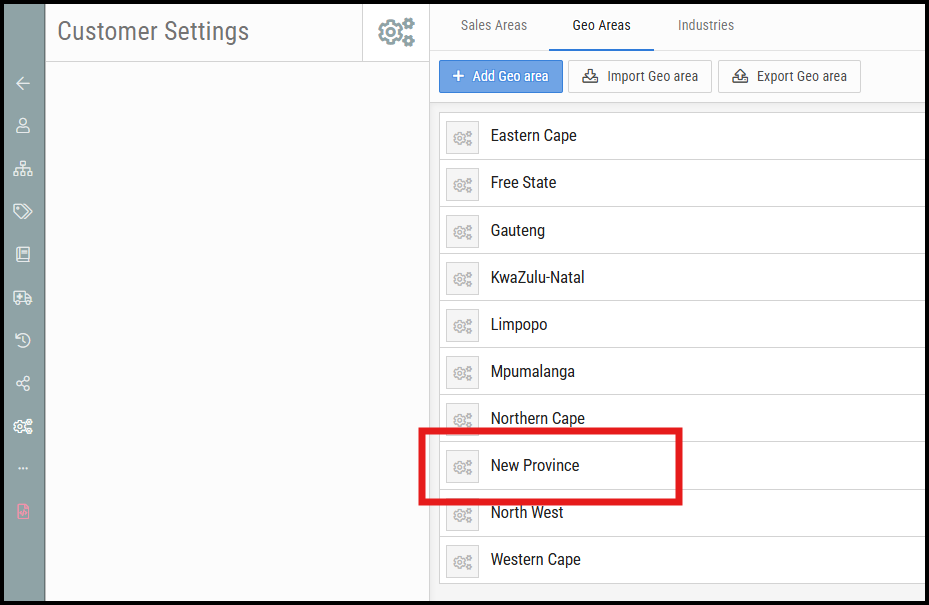
6. The new Geo Area will now appear in the list and will be available in the Geo Area dropdown when creating or editing a customer.
A template file is attached to this article. It includes all provinces within South Africa and can be used to import directly into BMS.1. In BMS, go to Admin > Settings > Customer Settings > Geo Areas.
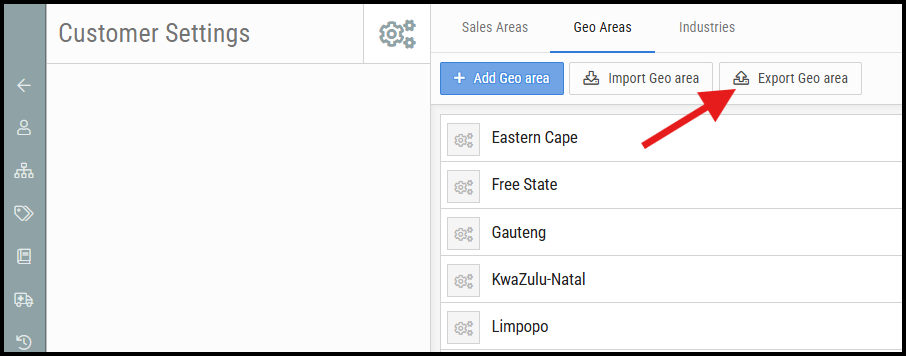
2. Click Export Geo Area to download your current Geo Area list as a CSV file. Save it to your computer.
3. Open the CSV file in Excel.
4. Make the required edits or additions. The file requires two columns: Area Name and Code.
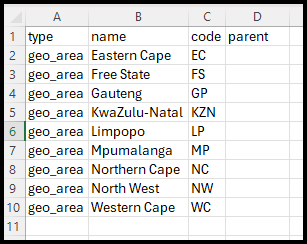
5. Save the file in CSV format.
6. Return to BMS: Admin > Settings > Customer Settings > Geo Areas.
7. Click Import Geo Area, browse for the updated CSV file, and select it.
8. Click Import Selected File.
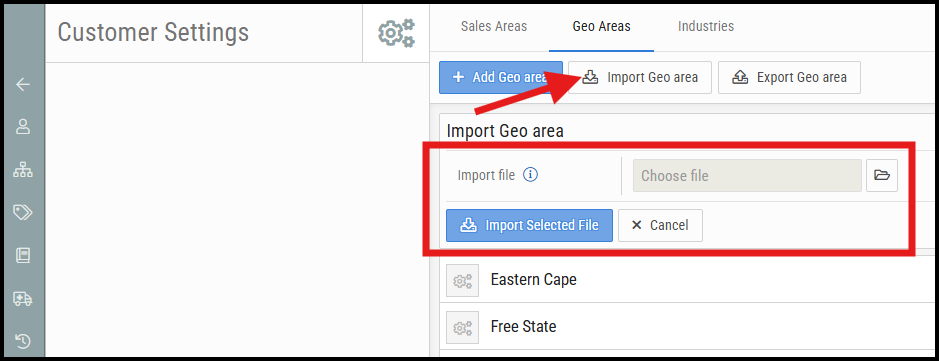
9. The Geo Areas list will now be updated with the new or modified entries.
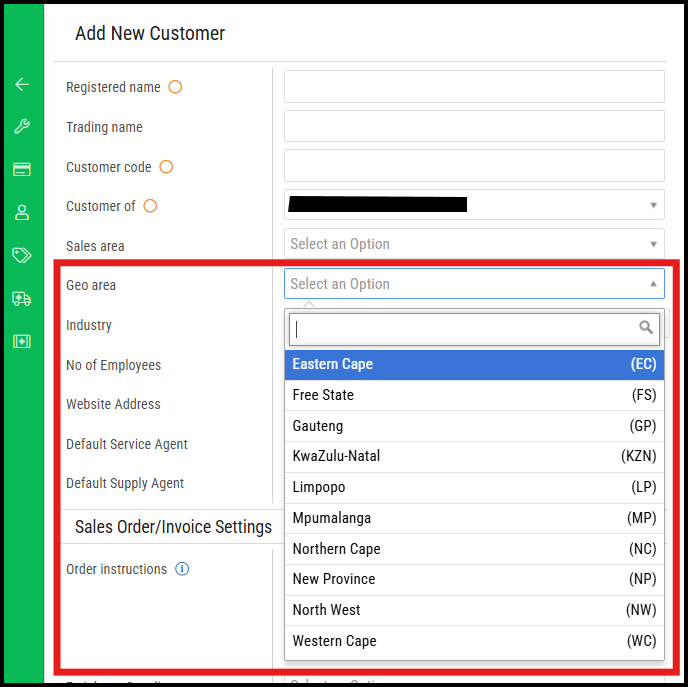
1. Navigate to any Customer record or click Add New Customer.
2. Open the Geo Area dropdown.
3. Confirm the manually added or imported Geo Areas appear in the list.
- The Code field must be unique for each Geo Area — use a short, consistent convention (e.g. GP for Gauteng, WC for Western Cape).
- A template CSV with all South African provinces is attached to this article and can be imported directly without modification.
- Always export first before importing, so you have a backup and a correctly formatted template to work from.
- Importing will add new entries and update existing ones — it will not delete Geo Areas that are not in the import file.

support@innovativesolutions.co.za
+27 61 542 7262
Was this article helpful?
That’s Great!
Thank you for your feedback
Sorry! We couldn't be helpful
Thank you for your feedback
Feedback sent
We appreciate your effort and will try to fix the article