Summary
In BMS, customer records can have additional contacts linked to them for record keeping, client sites, and multiple points of contact. This article explains how to import customer contacts in bulk using the BMS import wizard.
How to import customer contacts into BMS
- Step 1: Prepare the contact import file
- Step 2: Start a contact import in BMS
- Step 3: Preview, map, and confirm the import
- Step 4: Process and verify the imported contacts
Step 1: Prepare the contact import file
- Use the attached CSV template for the contact import.
- Populate the spreadsheet with the contact details you want to import.
- Save the completed file as a CSV UTF-8 format.
- Keep a copy of the file for reference before importing.
Step 2: Start a contact import in BMS
- Log in to BMS.
- Go to the Admin module.
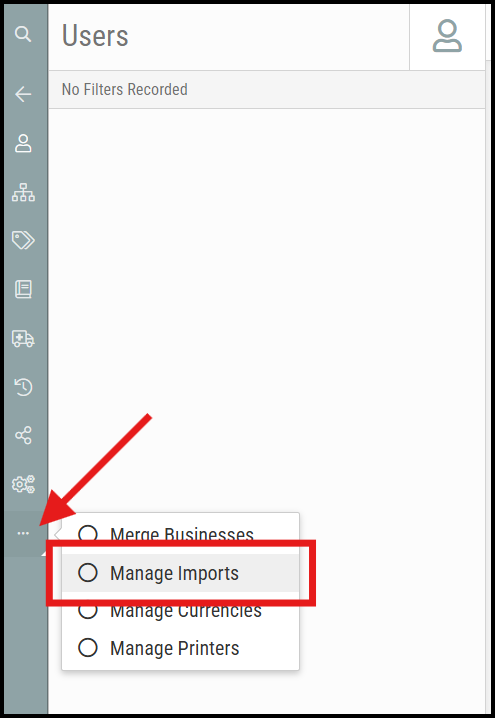
- Click the three dots menu.
- Select Manage Imports.
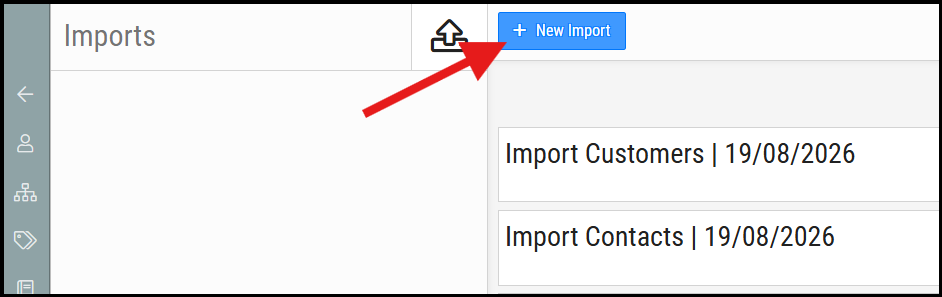
- Click New Import.
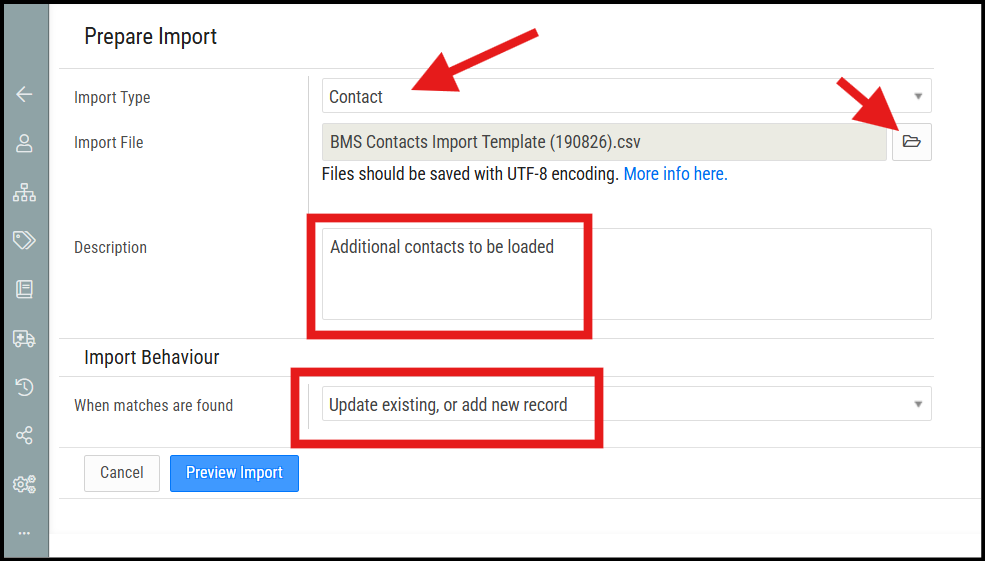
- Set the Import Type to Contact.
- Click Browse and select the CSV file you prepared.
- Add a description for the import if needed.
- This is optional, but useful for record keeping.
- Set the Import Behaviour to Update existing or add new record.
- Other options are available, such as Update existing only, Add only new, or Add new only, but the default recommended behaviour is to update existing contacts or add new ones.
- Click Preview Import.
Step 3: Preview, map, and confirm the import
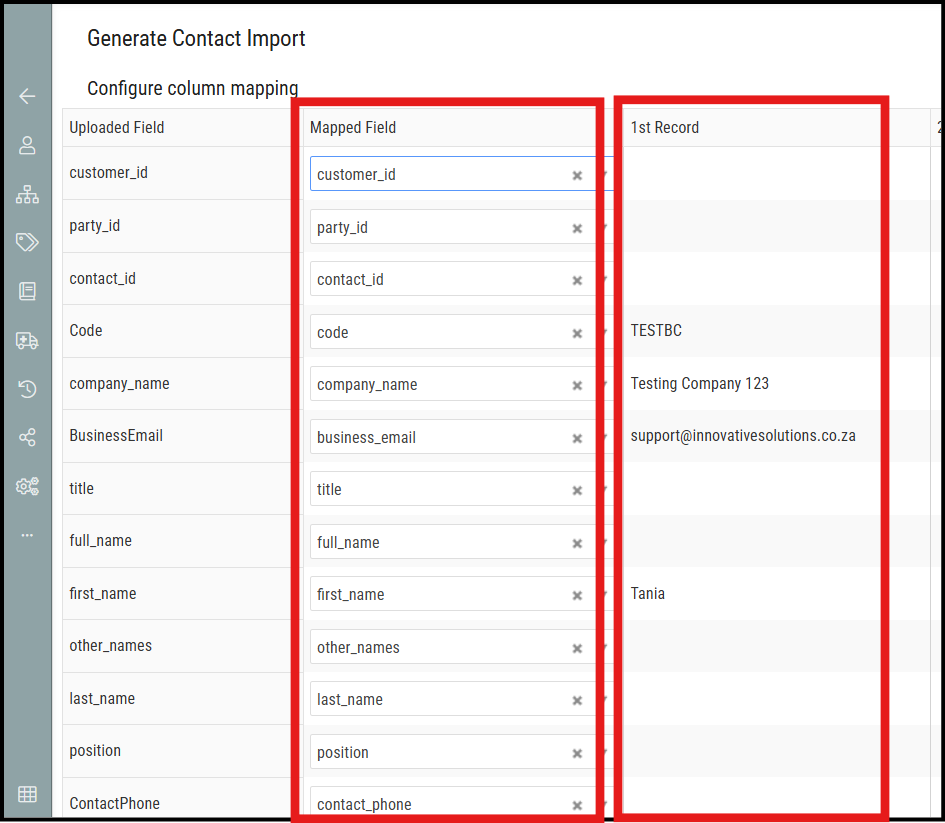
- Review the next step in the import wizard where the fields are mapped.
- If you used the attached template, the fields should map automatically.
- Confirm the sample data matches the correct BMS fields.
- If everything looks correct, click Confirm Import.
Step 4: Process and verify the imported contacts
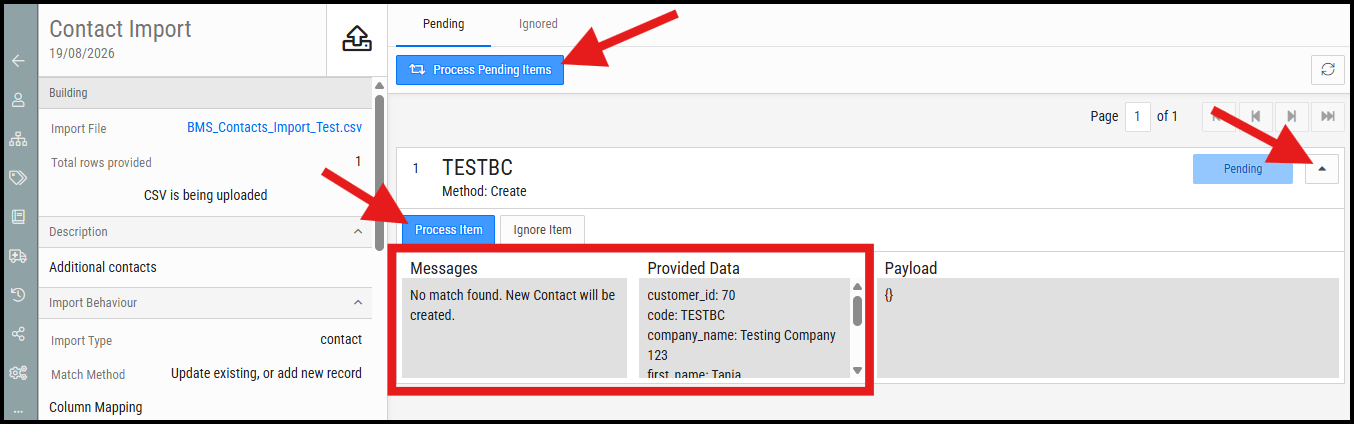
- The import will move to a staging view where the rows are listed for processing.
- Review the rows and confirm the data is correct.
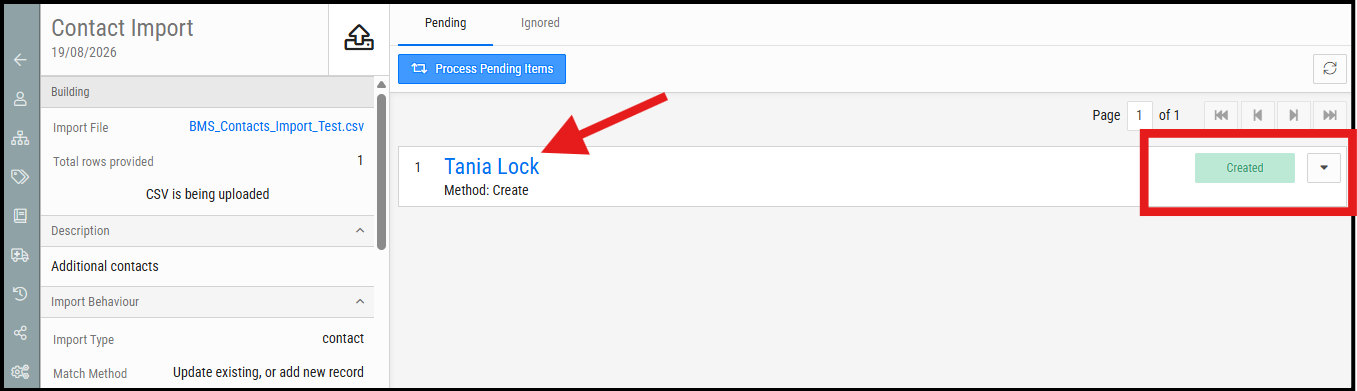
- Click Process Item for a single contact, or Process Pending Items to process multiple contacts in bulk.
- If successful, the row will show as created or updated.
- Click the dropdown arrow on a row to view the provided data and the import result.
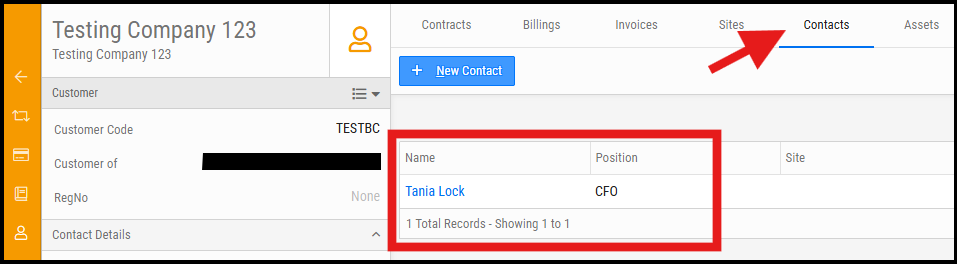
- Open the created contact record in BMS to verify the contact details were imported correctly.
Important notes
- Customer contacts are separate from customer records and can be imported independently.
- Use the attached template to ensure the CSV columns match the BMS import format.
- The recommended import behaviour is Update existing or add new record.
- Always check the staging step before processing to confirm the data is correct.
- Use the Ignored or error views, if available, to troubleshoot any rows that did not import successfully.
Was this article helpful?
That’s Great!
Thank you for your feedback
Sorry! We couldn't be helpful
Thank you for your feedback
Feedback sent
We appreciate your effort and will try to fix the article