In order to install PaperCut Hive onto the Konica Minolta devices, please follow the instructions below. You may also refer to the attached PaperCut Hive Embedded App Installation Guide - Konica Minolta.pdf.
In short, these are the steps to be followed:
Confirm Firmware:
1. Ensure that the firmware is updated and Soft Switch 25 is set accordingly. Latest firmware releases can be found here: Where can I find the latest and updated content such as Firmware, Service and Parts Manuals?
Set Marketing Area:
2. Within Service Mode, configure the Marketing Area to 'Europe'
Configure SSL Certificate Settings:
3. Log on as administrator on the device’s web interface (called “Page Scope Web Connection”) under http:// <ip-address-of-device>/ .”
4. In the “Security” section display the “PKI Settings” subsection. If there is no “PKI Settings” subsection, please ignore this section and refer to Appendix A instead for configuration of older devices.
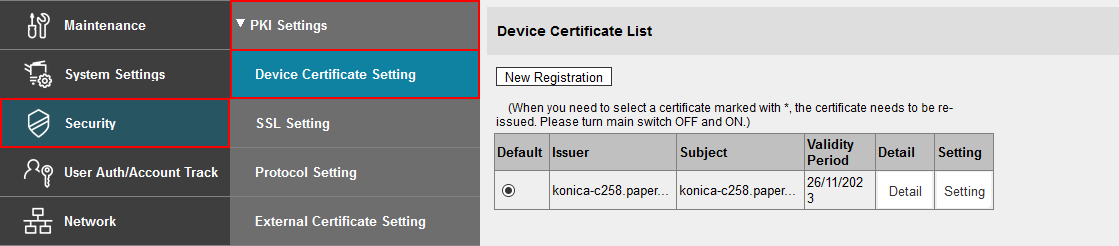
5. Create a new certificate following these steps. (Even if a certificate is already shown in the “Device Certificate List”, this certificate may not be usable for SSL. Please delete it and re-create a new one.)
a. Click “New Registration”, select “Create and register a self-signed Certificate” and click “OK”.
b. Fill in the fields with some values about your organization. The values have no functional significance.
c. For the “Validity Period”, the maximum number of days offered is recommended (usually 3650 = 10 years).
d. “Encryption Strength” can be left to the default values.
e. Click “OK”. The certificate will be generated. You will be asked to switch the device off and on again.
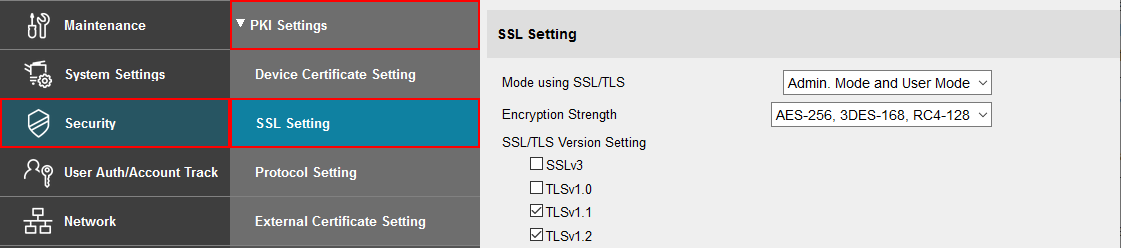
6. Log into the device web interface as administrator again. In the “Security” section display the “PKI Settings” subsection and from the menu on the left, choose “SSL Setting”. Change “Mode using SSL/TLS” to “Admin Mode” or “Admin Mode and User Mode” (on some machines: just “enable”). Your web browser will re-logon to the web server under “https” mode. You may have to confirm an “invalid certificate” in your browser.
7. Optional: If you are still using the default password, please change it in the “Security” section. Display the subsection Administrator Password Settings”, tick “Password is changed” and enter a new password and click “OK”. Keep a record of the password in a safe place, as per normal system management best practice.
Configure TCP Socket Settings:
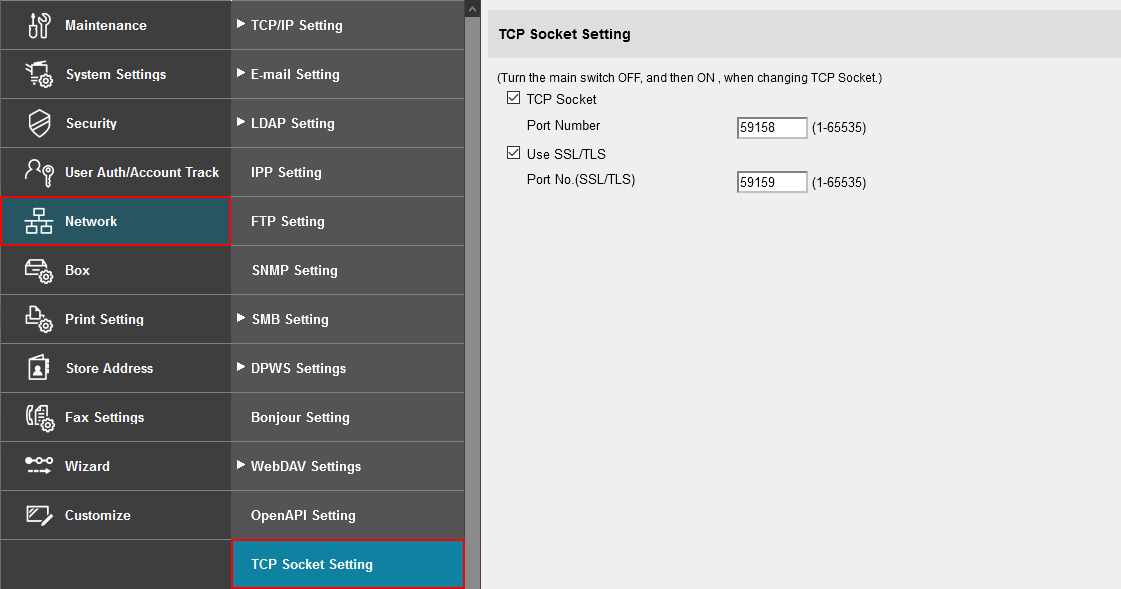
8. In the “Network” section, display the subsection “TCP Socket Setting”. Tick “Use SSL/TLS” and click “OK”. You will be asked to switch the device off and on again, however, just refresh the page.
Configure OpenAPI Settings:
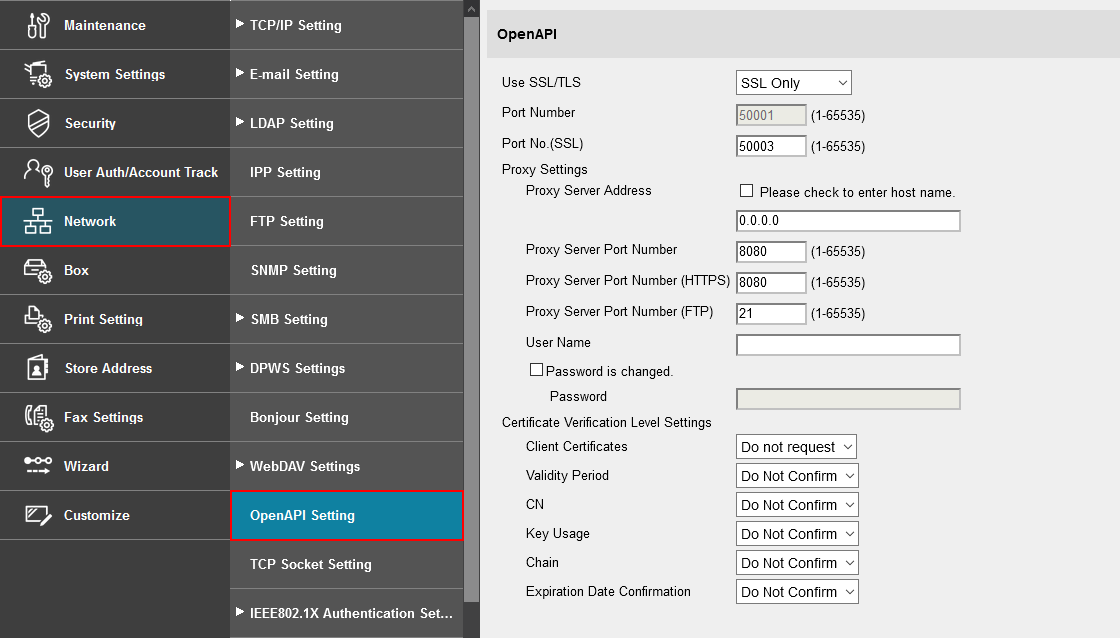
9. In the “Network” section display the “OpenAPI” subsection.
a. In the “Use SSL/TLS” drop-down list, select “SSL Only”.
b. Make sure the “Port No. (SSL)” is set to 50003.
c. Click “OK”.
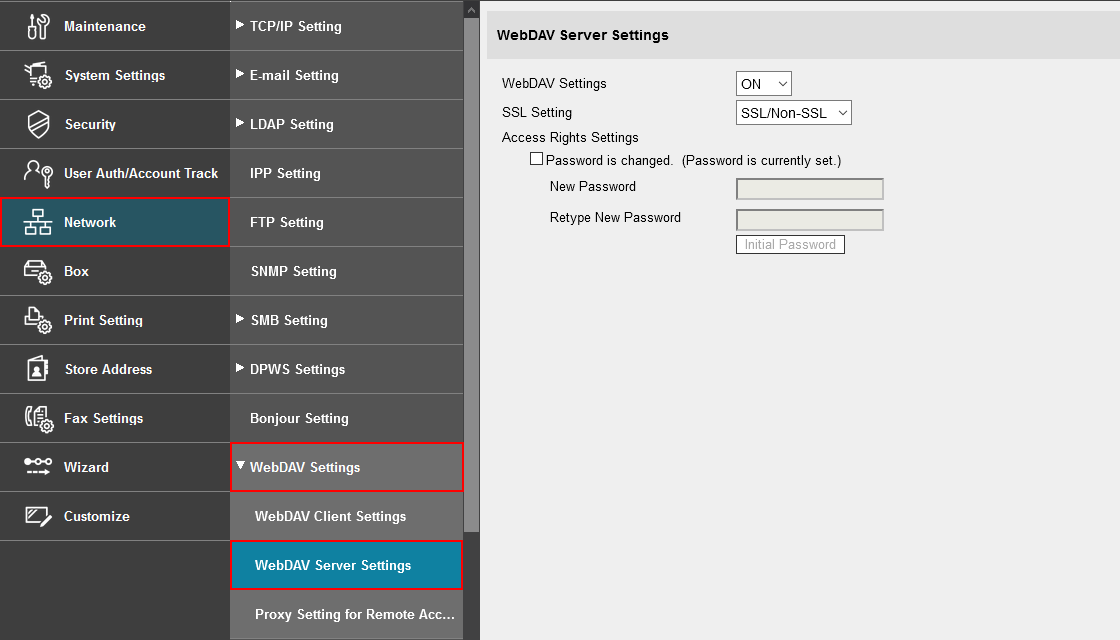
Configure WebDAV Settings:
10. Within Admin Mode on the Web browser, ensure WebDAV server is enabled on the device (under Administrator Settings > WebDAV Settings > WebDAV Server Setting). Port 80 on the device will need to be accessible from the PaperCut application server in order to push out application resources over WebDAV.
11. When MFD is configured for access check you can access the following URL: http://<MFP IP>/OpenAPI/DeviceDescription/ from the same network location where PaperCut server is deployed, where HOSTNAME is the hostname or IP address of the MFD. If accessed with your web browser the operation should complete successfully and an XML document published by the MFD be displayed.
Configure Web Browser Settings:
12. Check that the web browser is activated on the device prior to proceeding further.
The way in which you do this differs between models.
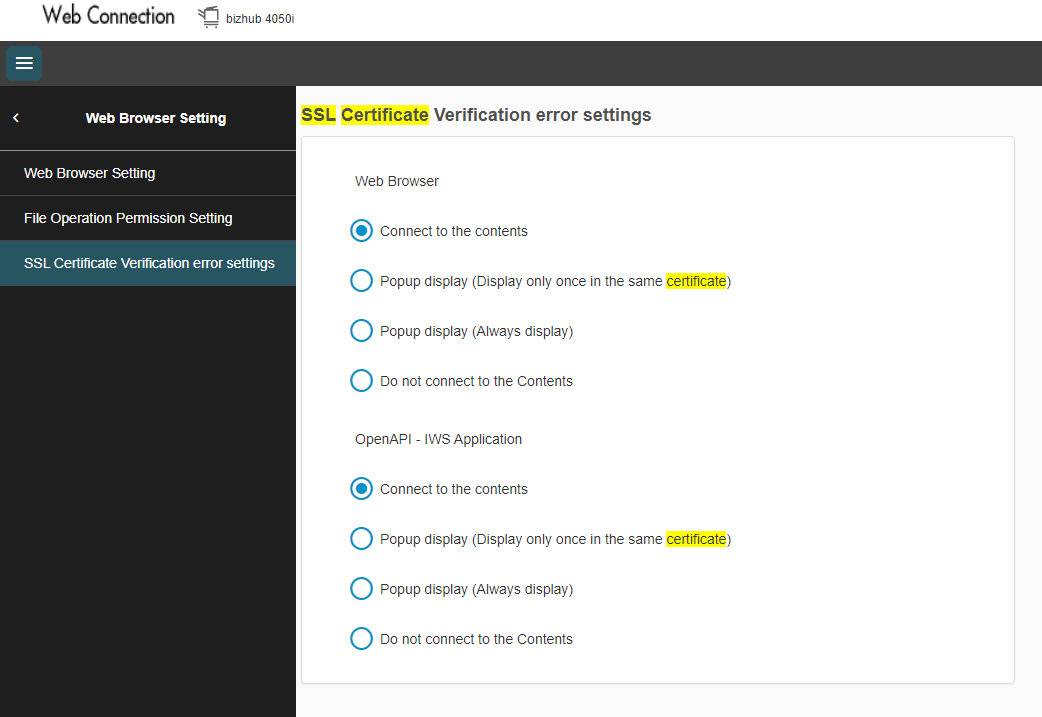
Configure 'SSL Certificate Verification error settings':
13. Navigate to 'SSL Certificate Verification error settings' under Network > Web Browser Setting. (Or search for SSL Certificate).
a. Change both settings to 'Connect to the content'.
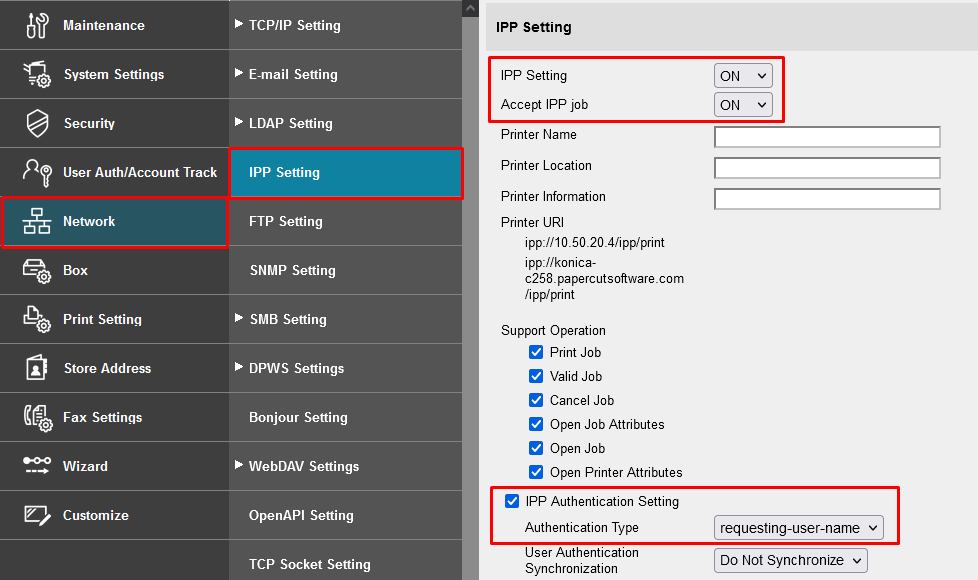
Configure IPP Settings:
14. In the Network section, click IPP Settings. Some devices may have this menu under HTTP Server Settings >
IPP Settings.
15. Ensure that IPP Setting and Accept IPP job are both set to ON.
16. Check the IPP Authentication Setting checkbox and set Authentication Type to requesting-user-name.
17. Some newer devices include an OpenAPI password that needs to be removed. To do so, access the administrator settings on the device’s panel, not the web interface:
a. Press the “Utility” button on the button panel.
b. Press “Administrator Settings” on the screen.
c. Log in with the administrator password.
d. Selection “System Connection” > “OpenAPI Settings” > “Authentication”.
e. Make sure “OFF” is selected and press “OK”.
18. For security reasons it is also recommended to change the device’s default administrator web access password.

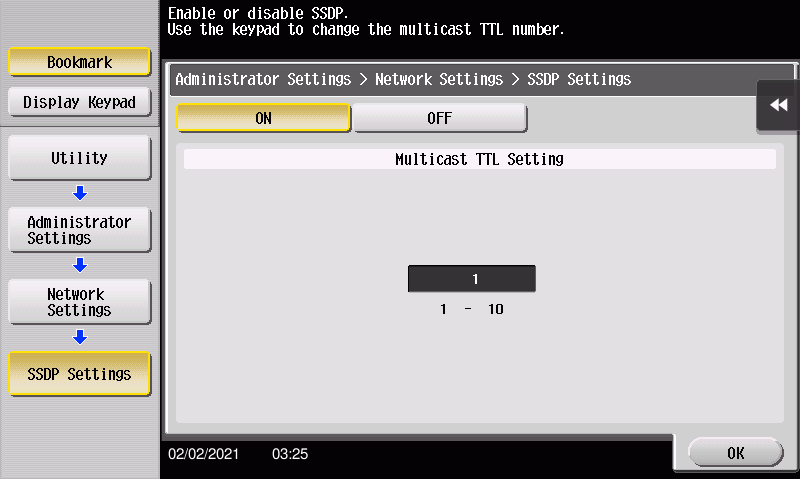
Configure SSDP Settings:
19. Ensure SSDP protocol is enabled under Utility > Administrator > Settings > Network Settings > SSDP Settings.
Deploy the PaperCut Hive App to the MFP:
20. Deploy the app as per the attached instructions.
If you encounter any issues during the configuration and deployment of PaperCut Hive onto the MFP, please search our Knowledge Base for solutions or reach out to our Support Helpdesk.

support@innovativesolutions.co.za
+27 61 542 7262
Was this article helpful?
That’s Great!
Thank you for your feedback
Sorry! We couldn't be helpful
Thank you for your feedback
Feedback sent
We appreciate your effort and will try to fix the article